In this article we connect a VCNL4040 to a Raspberry Pi Pico running Circuitpython
Sensor Information
The VCNL4040 integrates a proximity sensor (PS), ambientlight sensor (ALS), and a high power IRED into one small package. It incorporates photodiodes, amplifiers, and analog to digital converting circuits into a single chip byCMOS process.
The 16-bit high resolution ALS offersexcellent sensing capabilities with sufficient selections to fulfill most applications whether dark or high transparencylens design.
High and low interrupt thresholds can beprogrammed for both ALS and PS, allowing the component to use a minimal amount of the microcontrollers resources.
The proximity sensor features an intelligent cancellation scheme, so that cross talk phenomenon is eliminated effectively. To accelerate the PS response time, smart persistence prevents the misjudgment of proximity sensing but also keeps a fast response time.
In active force mode, a single measurement can be requested, allowing another good approach for more design flexibility to fulfill different kinds of applications with more power saving.
The patented Filtron technology achieves ambient lightspectral sensitivity closest to real human eye response andoffers the best background light cancellation capability(including sunlight) without utilizing the microcontrollers’resources.
VCNL4040 provides an excellent temperature compensation capability for keeping output stable undervarious temperature configurations. ALS and PS functions are easily set via the simple command format of I2C(SMBus compatible) interface protocol.
Operating voltage ranges from 2.5 V to 3.6 V.
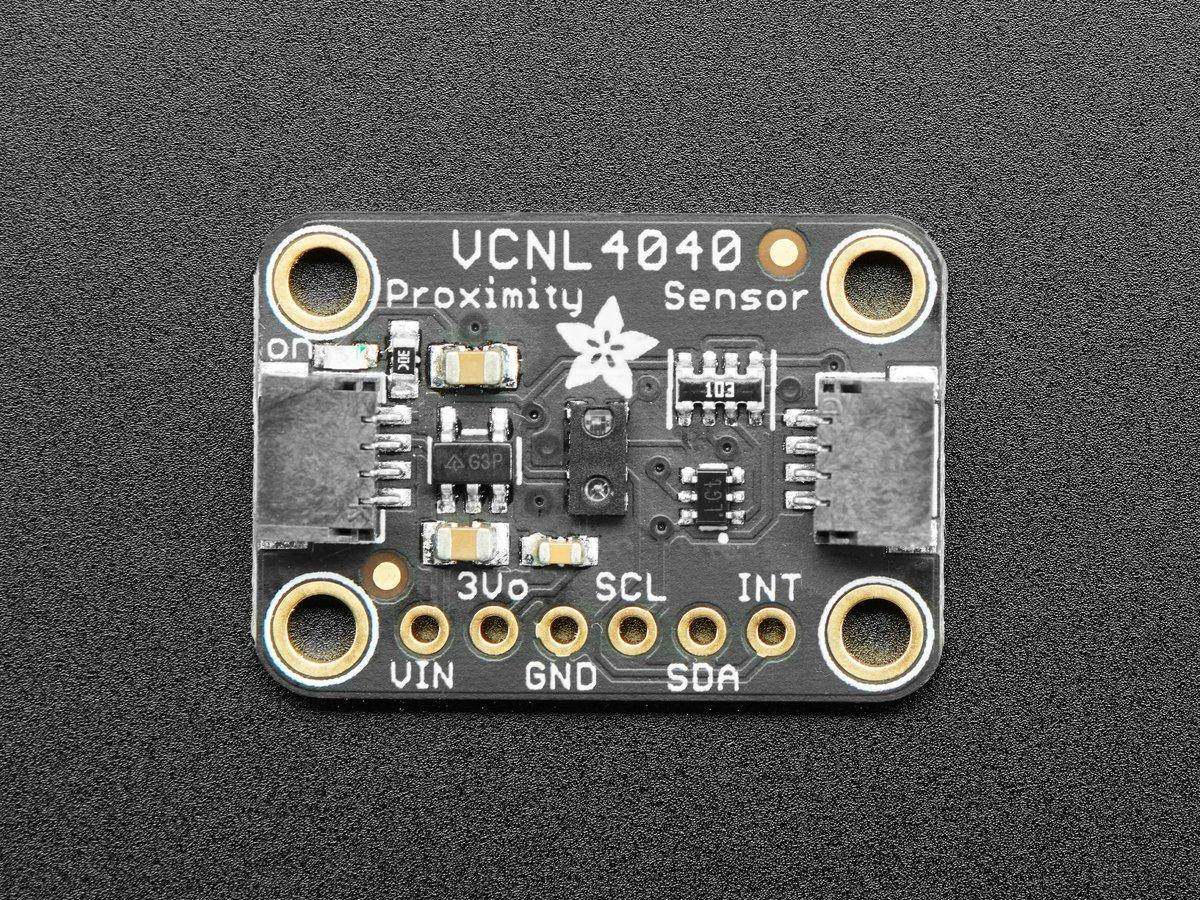
Here is the sensor I purchased from the good folks at Adafruit (via Pimoroni in the UK), there are other similar types of sensors available from other companies
Parts Required
| Name | Link |
| Pico | Raspberry Pi Pico Development Board |
| VCNl4040 | Aliexpress product link |
| Connecting cables | Aliexpress product link |
Schematic/Connection
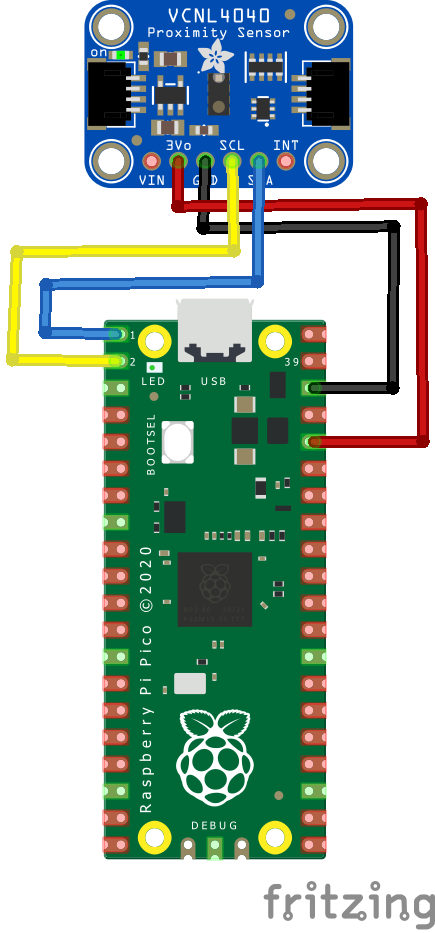
I used the Adafruit VCNL4040 sensor and in this case used the Stemma connection
For the STEMMA QT cables, it uses the Qwiic convention:
Black for GND
Red for V+
Blue for SDA
Yellow for SCL
So color coded for ease of use, this layout shows a connection to the module

rp2040 and vcnl4040
Code Example
I used Thonny for development
The following is based on a library , I copied the adafruit_vcnl4040.mpy library for this device to the lib folder on my Feather M0 Express – https://circuitpython.org/libraries
This is the basic example which comes with the library
[codesyntax lang=”python”]
import time
import board
import adafruit_vcnl4040
import busio

# Create sensor object, communicating over the board's default I2C bus
i2c = busio.I2C(scl=board.GP1, sda=board.GP0)
sensor = adafruit_vcnl4040.VCNL4040(i2c)

while True:
    print("Proximity:", sensor.proximity)
    print("Light: %d lux" % sensor.lux)
    time.sleep(1.0)
[/codesyntax]
Output
Here is what I saw in Thonny REPL window
Proximity: 27
Light: 3 lux
Proximity: 15
Light: 6 lux
Proximity: 1
Light: 5 lux
Proximity: 1
Light: 5 lux
Proximity: 187


